So I perused the world wide web for some tutorials for myself so that I could teach you all. I learned a few things.
-Moms love to blog. I found a hundred tutorials on how to make a button and put it on a blog, most of these were written by mothers. I even had to call my own mom to get some info on how to do this.
-Blogging is like scrap-booking.
-Now I know how to make a link from scratch.
Look to the right of your screen. I made the facebook.com button which when pressed will pull up a new window and link you to my Facebook profile. Awesome. This is pretty simple to do. You could start baking your cookies now and before they are out of the oven you will have your link up and running!
First off you need to make your design or steal one from the interwebz. I made this one in photoshop real quick like.


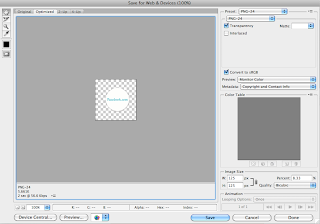
Then you must save for the web. File> Save for Web & Devices…

Your image needs to be saved as a PNG-24. The image size should be 125 px W by 125 px H. When it is saved as a PNG-24 the background is transparent so there will be no box around it. Save your image and name it something that is easy to remember.
Now go online to some image uploading site. I used photobucket.com because that is what my mom told me to do and I do what my mom tells me to do. Anyways, It is a really simple site to use and it's free. You will need to put your image online so that you can link to it.
After its online go to your blog. GO! Go to dashboard>design>page elements. (if you don't have blogspot.com there is most likely something very similar to this on your personal blog.)
Once on the page elements page click on (Add a Gadget). Go to HTML/JavaScript. This will open up a window wherein you may write some HTML.


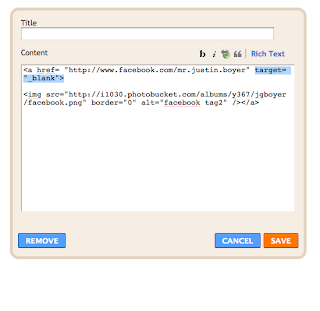
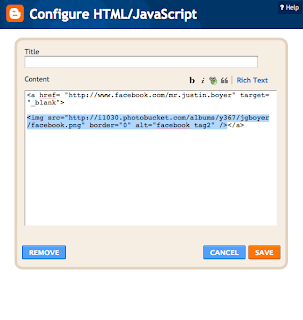
Real quick lesson here: what is not highlighted is the HTML code for a link. The highlighted text is what the link look likes and what it does when you click it.
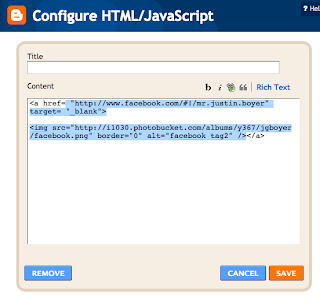
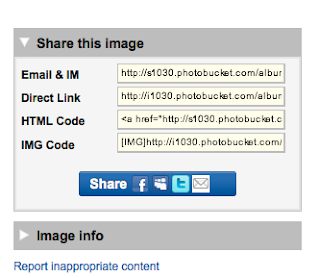
Now you will have to put all your information in it. This is really simple. All you really need to do is some copying and pasting, much like scrap-booking. Go back to photobucket.com, on the bottom left hand side you will find a menu that gives you the codes for your image. Copy the HTML Code.
Now go back to the HTML/Javascript page you were on with your blog. Once you're there Paste the code. You will need to change this a little bit (but not too much-it's super easy). Be sure to delete the URL for photobucket and replace it with the site that you want to link to. Write it inside the quotation marks. I am going to link to facebook.com. So that is what I have in the quotation marks.
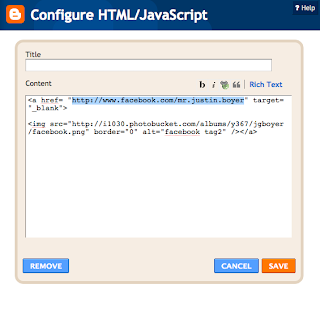
This means it will open a new window.
This is the code and link to photobucket.com where you image is.
Click save and then check out your blog, you should have a pretty sweet little gadget on the side or wherever you place it. Now go trick out your ghetto blogs and make 'em steezy. Do what your momma tells you.
No comments:
Post a Comment